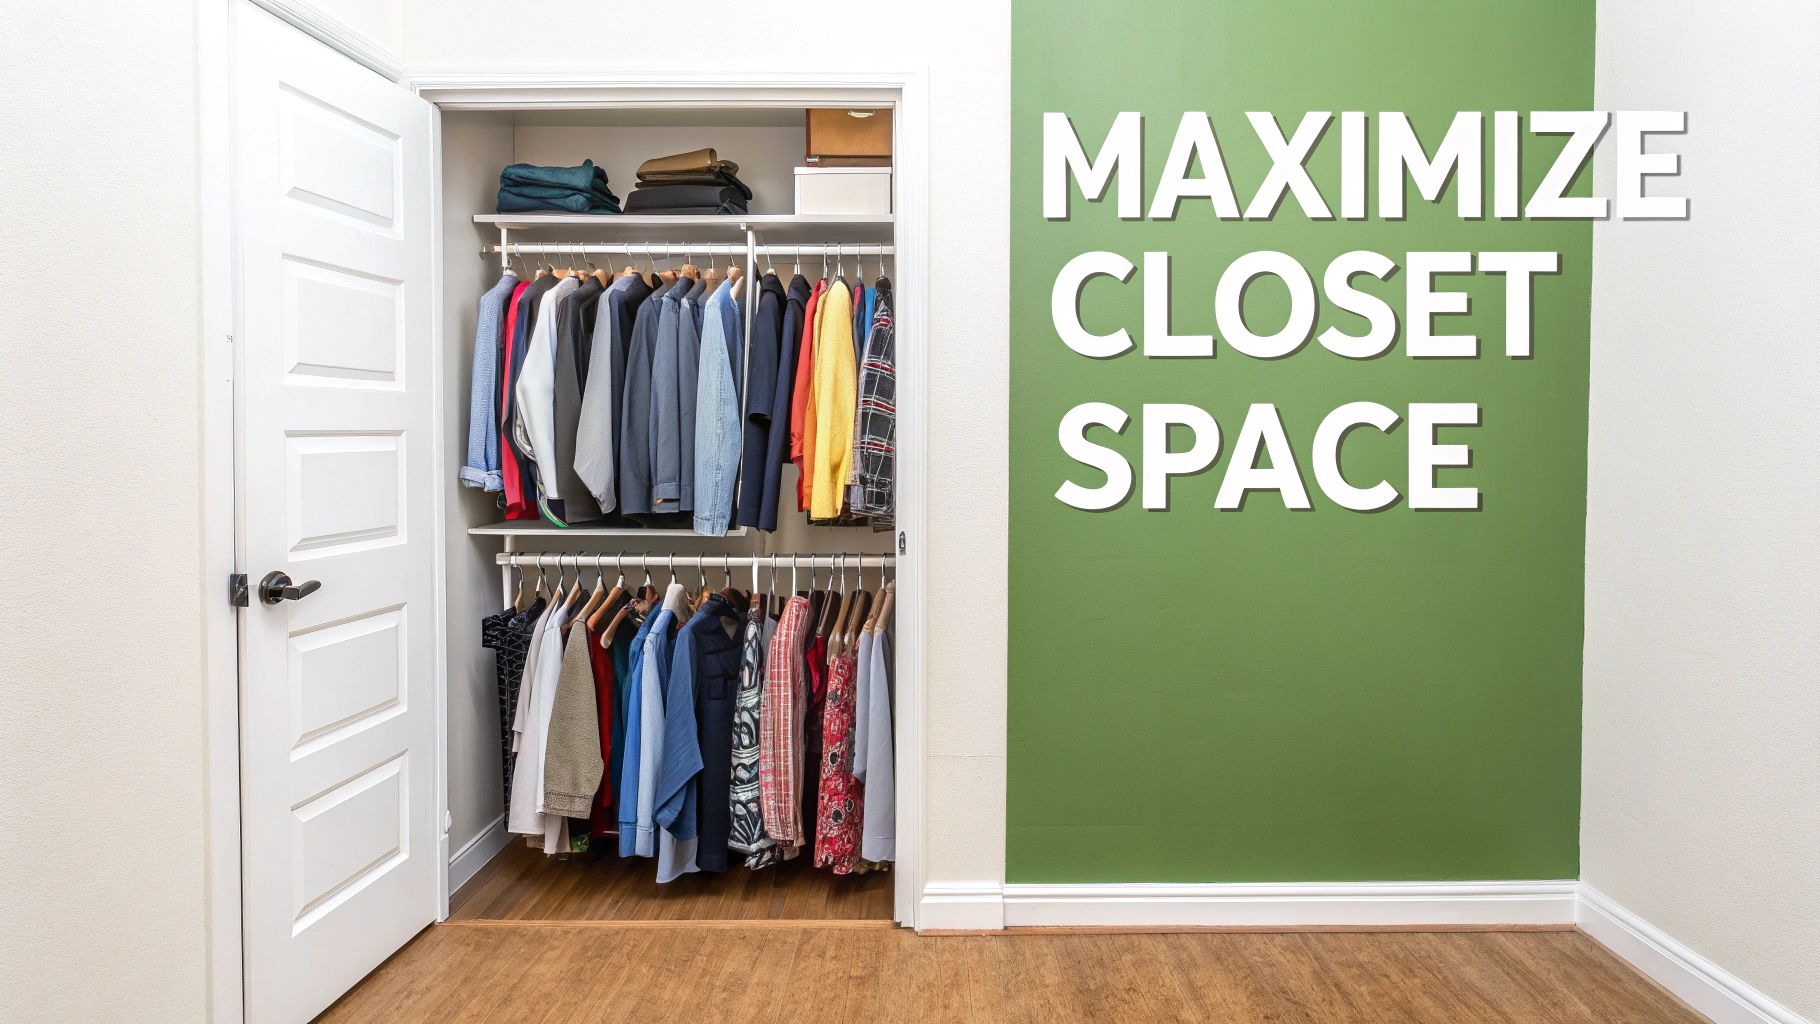
Tame Closet Chaos: Your Guide to a Telescoping Closet Rod

If you've ever wrestled with a closet rod that's just a little too short or struggled to fit an odd-sized space, you know the frustration. That’s where a telescoping closet rod comes in as your secret weapon for closet organization. Think of it as a simple, adjustable bar designed to create the perfect hanging space in those custom, non-standard closets. Unlike fixed-length rods, this one expands and retracts, giving you a perfect wall-to-wall fit without a single saw cut.
This ingenious design makes it a go-to solution for anyone who wants a quick and painless closet upgrade, turning a cluttered space into a streamlined wardrobe.
Conquer Closet Chaos with a Telescoping Rod
We've all been there—staring into a cramped, chaotic closet that feels more like a storage locker than a functional wardrobe. Piles of clothes seem to multiply overnight, and that one sad, sagging rod just can't keep up. The real problem usually isn't the size of your closet; it's how you're using the space. A telescoping rod tackles this problem head-on, giving you a versatile and sturdy foundation to finally get organized.
The magic is in its adaptability. Most closets, especially in older homes, have quirky, non-standard dimensions. A telescoping rod eliminates guesswork and awkward gaps, providing a seamless base for your entire organization system.
Maximize Every Inch of Your Space
Truly effective closet organization means using every bit of available real estate, both horizontally and vertically. A perfectly fitted rod is your first and most important step. When you can span the full width of your closet, you instantly increase your hanging room. It might seem like a small tweak, but it makes a world of difference for decluttering, particularly in a kid's room or a narrow hall closet.
As you plan your closet makeover, it's helpful to remember how practical solutions like this fit within broader interior design principles. A tidy, functional closet doesn't just look good—it contributes to a calmer, more orderly feeling throughout your home.
The secret to a functional wardrobe isn't necessarily a bigger closet—it's smarter hardware. An adjustable rod empowers you to customize your space to your specific needs, laying the groundwork for a system that truly works.
A Foundation for Better Organization
Putting in a telescoping rod isn't just about adding a bar for hangers. It's about creating an entirely new organizational structure from the ground up. Once that sturdy rod is in place, you can start implementing other game-changing strategies to bring order to your wardrobe.
- Zone your wardrobe: Finally, you can group all your shirts, pants, and dresses together, or create sections for work, casual, and formal wear for easy access.
- Create vertical layers: In closets with high ceilings, you can easily install a second rod below the first, instantly doubling your hanging capacity and making use of previously wasted space.
- Integrate space-saving hangers: Those clever multi-garment hangers need a sturdy, well-supported rod to work their magic, and now you'll have one.
This flexibility has turned telescoping rods into a staple of modern organization, especially for those of us living in smaller, urban homes where every inch counts. It’s no surprise that the global market for closet rods, with these adjustable designs leading the charge, is valued at around $1.5 billion and continues to grow. It’s a clear sign that people are moving toward smarter, more flexible home storage.
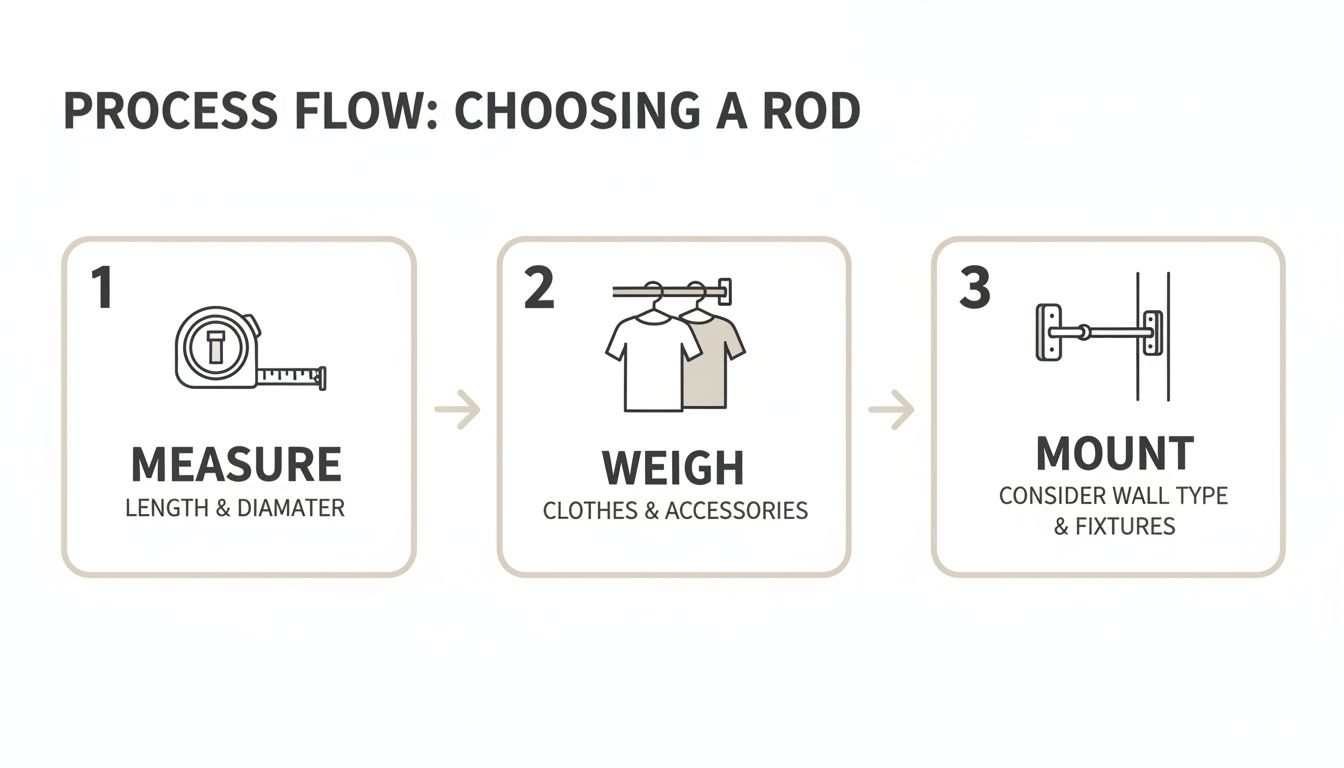
Choosing the Right Telescoping Rod for Your Closet
Picking the perfect telescoping closet rod is about more than just finding one that fits. It’s about choosing hardware that can handle your wardrobe and support your organization goals. Not all rods are built the same, and the right one depends on what you plan to hang and the type of closet you have.
Let's start with the basics: material and finish. If your closet is packed with heavy winter coats, denim, and suits, a heavy-duty steel rod is a necessity. Its strength prevents the dreaded sag common with flimsier options. But if you're outfitting a small closet with lightweight blouses and shirts, a standard rod with a modern chrome or matte black finish will provide a sleek, functional base for your organized space.
Understanding Weight Capacity
Before you buy, take a minute to estimate how much your clothes weigh. This is a crucial step for long-term organization, as an overloaded rod will bow or collapse, undoing all your hard work. It’s easy to underestimate the collective weight of fabric.
Here’s a simple way to think about it:
- Light-Duty (up to 20 lbs): Perfect for a kid's closet or a small collection of summer dresses and light shirts.
- Medium-Duty (20-45 lbs): This is the sweet spot for most wardrobes. It can easily handle a mix of shirts, pants, and a few sweaters without stress.
- Heavy-Duty (45+ lbs): Absolutely essential for shared closets, long spans, or wardrobes heavy on leather jackets, wool coats, and formalwear.
Want a quick reality check? Grab an armful of the clothes you plan to hang, step on your bathroom scale, and jot down the number. Then, weigh yourself and subtract. This gives you a real-world number to guide your purchase.
Tension Mounted vs. Fixed Mount Rods
Next is the big decision: how will the rod stay up? Your choice here boils down to permanence versus convenience, and each has its place in closet organization.
A tension-mounted rod is the ultimate no-fuss solution. It uses an internal spring to push against the closet walls, holding itself up with pressure. No tools, no drilling, no holes. It’s a fantastic choice for renters, dorm rooms, or temporary setups where you need flexible hanging space without commitment.
On the flip side, a fixed-mount telescoping closet rod offers superior strength and stability. This type screws directly into brackets anchored to the wall—ideally into wall studs. If you need to support a heavy wardrobe and want a permanent, worry-free foundation for your organizational system, this is your best bet. A sturdy, fixed-mount setup also works beautifully with other tools like space-saving hangers that help you maximize every inch.
To make it even clearer, here’s a quick breakdown to help you decide.
Tension Rod vs Fixed-Mount Rod: Which Is Right For You?
| Feature | Tension-Mounted Rod | Fixed-Mount Rod |
|---|---|---|
| Installation | No tools required; uses spring tension | Requires drilling, screws, and brackets |
| Best For | Renters, temporary storage, light loads | Homeowners, heavy wardrobes, long-term use |
| Strength | Lower weight capacity; may slip | High weight capacity; extremely stable |
| Wall Impact | Leaves no marks | Requires drilling permanent holes |
| Adjustability | Easy to move and readjust | Fixed in place once installed |
Ultimately, a tension rod offers flexibility for evolving storage needs, while a fixed-mount rod is an investment in pure, dependable strength for a highly organized closet.
The trend toward modular designs in homes really underscores how important this hardware is. In fact, hanging rods are a core component in 70% of modular closets, and they're usually made from rust-resistant, epoxy-coated steel for durability. Using an adjustable rod like this can boost your vertical space efficiency by 25-40%, a game-changer for anyone looking to declutter and organize.
A fixed-mount rod is an investment in stability, giving you peace of mind for a heavy wardrobe. A tension rod is an investment in flexibility, perfect for evolving needs and temporary spaces.
So, think about your lifestyle. For a kid's closet that will change as they grow, a tension rod offers amazing adjustability. But for that bustling, shared master closet? The robust, set-it-and-forget-it nature of a fixed-mount rod is the clear winner.
Putting Up Your New Closet Rod: A No-Nonsense Guide
You've picked out the perfect telescoping rod, and now it's time to install it. Getting this right is what turns a cluttered closet into a functional, organized space. Whether you went with an easy-peasy tension rod or a heavy-duty fixed-mount, a little prep work makes all the difference.
First things first, let's get your tools together. No matter which type of rod you're installing, you'll absolutely need a tape measure and a level. Don't even think about winging it—these are your best friends for a professional-looking, functional installation.
If you're tackling a fixed-mount rod, you’ll also need to grab a stud finder, a pencil, a drill with a set of bits, and maybe some drywall anchors just in case the studs don't line up exactly where you need them.
The Quick Win: Installing a Tension Rod
Putting up a tension rod is one of the most satisfyingly fast organizational upgrades you can make. The magic is in the spring-loaded pressure it creates between two walls.
Start by twisting the rod to extend it so it's just a bit longer than the space—about an inch or two is usually perfect. Now, just squeeze the rod to compress it, tuck one end against a wall, and guide the other end into place. When you let go, the internal spring pushes outward, locking it firmly in position.
Grab your level and make sure the rod is perfectly horizontal. Even a tiny slant will cause hangers to slide, disrupting your neatly organized zones.
Here's a pro tip: Give the wall surfaces a quick wipe-down with a dry cloth before you start. Dust or grime can make the rubber end caps slip over time, and you want that grip to be solid from day one.
The Powerhouse Install: Putting Up a Fixed-Mount Rod
When you need a more permanent solution that can handle some serious weight, the fixed-mount rod is your hero. This setup involves screwing mounting brackets directly into the wall, creating an unshakeable foundation for your clothing organization system.
The most critical part of this job is finding the wall studs. Pull out your stud finder, scan the walls, and use a pencil to mark where those solid wooden beams are. This is where you want to anchor your brackets for maximum strength. Use your tape measure and level to make sure the marks on opposite walls are at the exact same height.
Want to see how this fits into a bigger picture? We cover all sorts of rod configurations in our detailed guide on the benefits of a hanging closet rod.
Once you've marked your stud locations:
- Drill Pilot Holes. Use a drill bit that’s slightly smaller than your screws to pre-drill holes. This simple step prevents the wood from splitting and makes driving the screws in a breeze.
- Attach the Brackets. Line up the brackets with your pilot holes and screw them in securely with the hardware that came with your rod.
- Set the Rod. Extend your telescoping rod to the right length and simply pop it into the brackets. Some models have a small set screw you'll tighten to lock the rod in place.
This quick visual guide breaks down the whole process, from measuring your closet to picking the right mounting style.
As you can see, a great setup is all about knowing your space and what you plan to hang before you ever pick up a drill.
It's this straightforward installation that has made telescoping rods a go-to for so many people. As the U.S. South experiences a migration boom that drives 29.12% of all closet organizer sales, the demand for fast, effective DIY storage is skyrocketing. In fact, choosing a telescoping rod can slash closet setup time by up to 40% compared to measuring, cutting, and fitting a custom rod.
Tackling Common Installation Headaches
Even the simplest DIY projects can throw you a curveball. If your new telescoping closet rod is giving you trouble, don’t sweat it. Most of these little hiccups are surprisingly easy to fix, and you’ll have your closet organization project back on track in minutes.
A tension rod that won’t stop slipping is probably the most common complaint I hear. The problem is almost always that the end caps just can't get a good grip on the wall. Before you do anything else, grab a clean, dry cloth and give both wall surfaces a good wipe-down. You'd be surprised how often a little dust is the real culprit.
Still slipping? The next trick is to add some non-slip rubber or silicone pads to the ends. You can find these at any hardware store. They add a ton of extra friction, which is a lifesaver on slick, glossy paint.
What About Fixed-Mount Rods?
With a fixed-mount rod, the biggest challenge is usually the wall itself. You’ve found the perfect height, but your stud finder is coming up empty. This is where a good set of drywall anchors becomes your best friend.
Don't just grab the first ones you see. You need anchors specifically rated to hold a decent amount of weight—always go for a rating much higher than what you actually plan to hang. It's a cheap insurance policy for a secure closet rod. Installing them is a breeze:
- Drill a pilot hole that matches the anchor's size.
- Tap the anchor in gently until it sits flush with the wall.
- Drive the bracket screw straight into the anchor. You'll feel it lock in for a super strong hold.
If your rod is starting to sag in the middle, it's telling you one of two things: it's either overloaded, or the span is too wide for its own good. Take a hard look at how much you've hung on it and check that against the rod’s weight capacity.
If you’ve simply packed too much on, you’ll either need to thin out your wardrobe or switch to a sturdier, heavy-duty rod. But for any span over 48 inches, the real problem is likely a lack of support. The fix is a center support bracket. This little piece of hardware screws into the back wall and cradles the rod right in the middle, instantly eliminating that annoying sag and making the whole setup rock-solid.
Smart Organization Strategies for Your New Space
Okay, your new telescoping closet rod is in and feeling solid. Now the real fun begins. Getting the rod installed is the first step, but now you get to turn that cluttered space into a wardrobe that actually works for you, making your daily routine that much easier.
Think of this as more than just a hardware upgrade—it's a full closet makeover. That sturdy, perfectly-fitted rod is the backbone you need to finally bring in the smart storage tools that just wouldn't have worked on a flimsy, sagging bar.
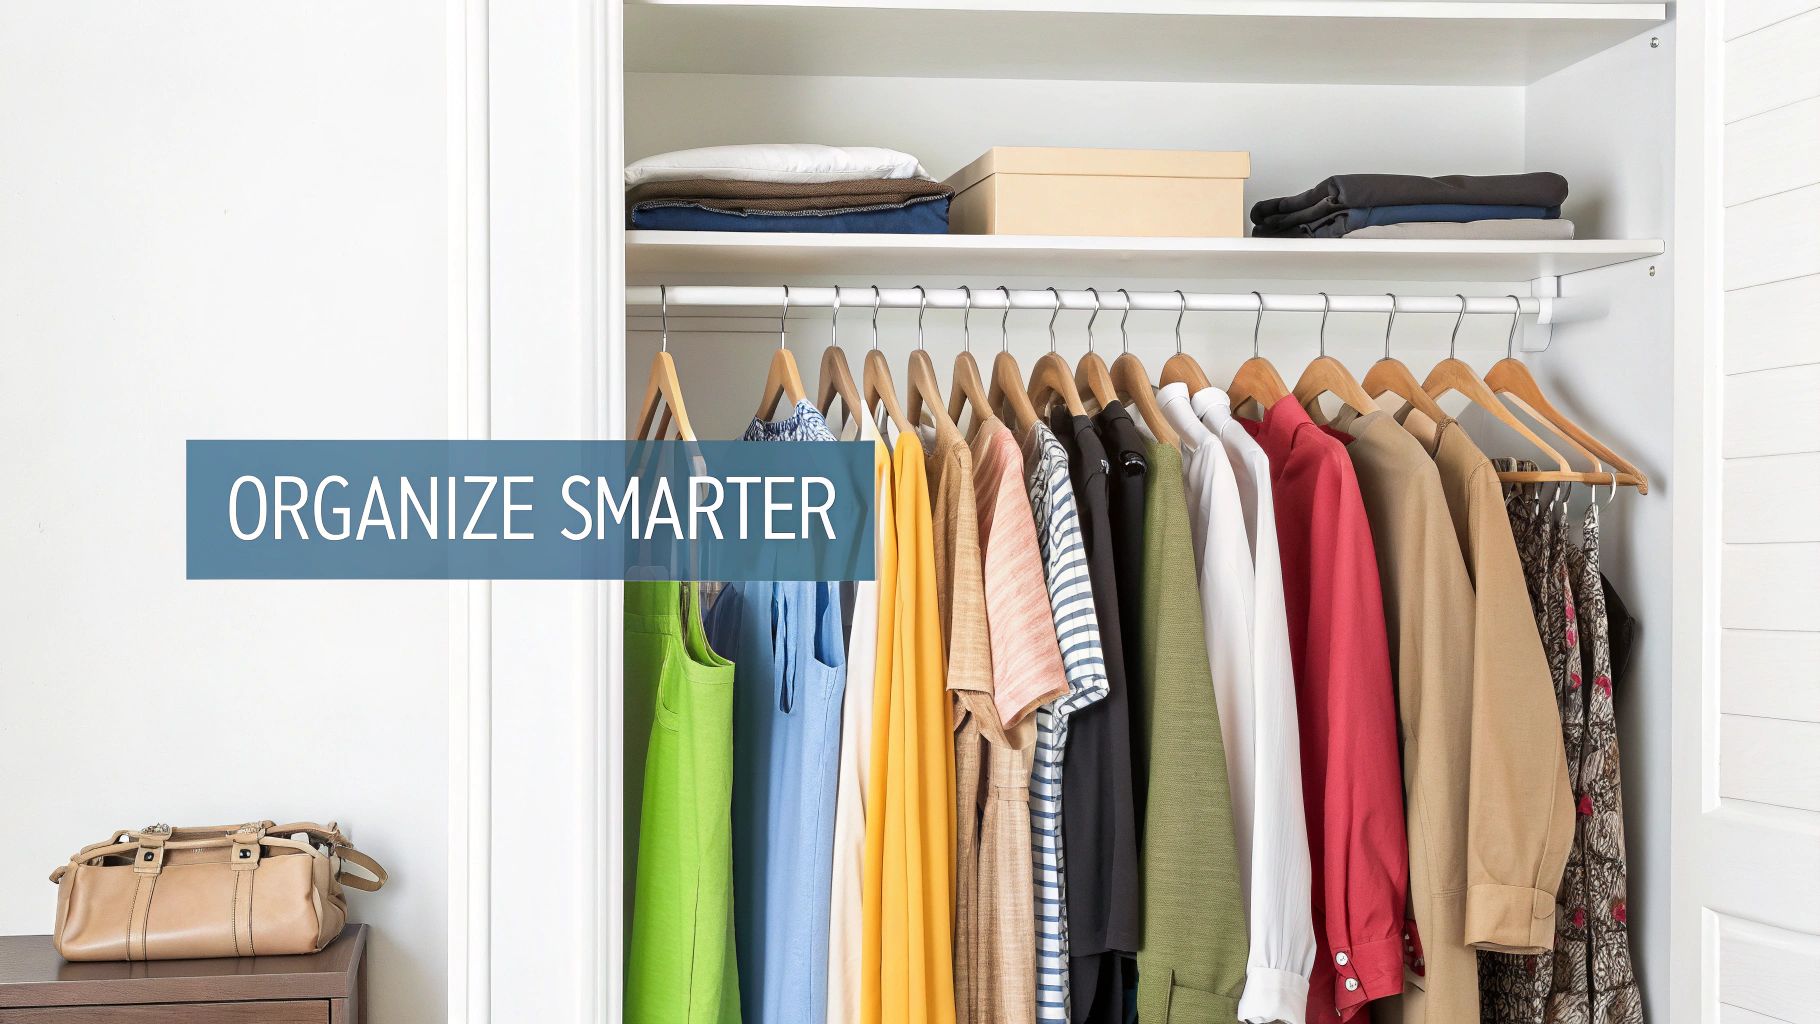
Harness the Power of Specialized Hangers
The quickest win for gaining more space is to rethink your hangers. Those standard plastic hangers are space hogs. Specialized hangers, on the other hand, can instantly free up an incredible amount of room on your new rod.
- Tiered Pant Hangers: These are an absolute must if you have a collection of jeans or slacks. You can hang several pairs vertically on a single hanger, shrinking a foot of closet real estate down to just a few inches.
- Multi-Garment Hangers: I love these for shirts and blouses. They let you cascade multiple items straight down, effectively doubling or tripling your hanging capacity for tops without cramming everything together.
- Slim Velvet Hangers: While they don't stack vertically, their super-thin profile means you can fit way more items side-by-side. Plus, the non-slip velvet grip is perfect for keeping silky tops and wide-neck shirts from sliding off.
Using the right hangers doesn't just save space—it keeps your clothes in better shape by preventing wrinkles and stretching.
A well-organized closet starts with the right foundation. Your telescoping rod is the strong backbone, and space-saving hangers are the tools that build an efficient system upon it.
Create Functional Wardrobe Zones
With reliable hanging space, you can finally stop the old "shove-it-in-wherever-it-fits" routine. The key is to create logical 'zones' by grouping similar items together. It sounds simple, but this one strategy makes finding what you need almost effortless.
Most people find it intuitive to organize by garment type: all your shirts in one section, pants in another, followed by dresses. It’s a classic for a reason.
Another approach I find really useful is organizing by occasion. You could dedicate one section to work clothes, another to casual weekend stuff, and a third for formal wear. This is a lifesaver on busy mornings. If you've got the vertical space, you could even install a second rod to create a double-decker system. We actually have a whole guide on how to install a double closet rod if you want to explore that.
If you're planning a bigger overhaul, it's worth looking at broader strategies. For some great inspiration on decluttering and maximizing efficiency, check out guides on walk-in closet organization systems. You'll find tons of ideas for building a truly custom space around your new rod.
Your Questions, Answered
Even the simplest home organization projects can bring up a few questions. Let's tackle some of the most common ones that come up when people are choosing and installing a new telescoping closet rod. Getting these details right will make your project a total success.
Can I Cut a Telescoping Closet Rod?
Nope, you definitely don't want to do that. The magic of a telescoping rod is its built-in adjustability—one part slides inside the other to fit your space perfectly. Taking a saw to it would completely ruin that mechanism, and you'd just be left with a broken rod.
The key is to buy the right size from the start. Just measure your closet width, and then find a rod whose range covers that measurement. For instance, if your closet is 40 inches wide, a rod that adjusts from 30 to 48 inches is exactly what you need.
What's the Best Height to Install a Closet Rod?
This is a great question, and the answer really depends on what you're hanging. There’s no single magic number, but here are some tried-and-true guidelines that work for most wardrobes.
- Dresses & Long Coats: To keep long items from dragging on the floor, aim for a height of 66 to 72 inches from the ground.
- Shirts & Folded Pants: A height of about 40 to 42 inches is a sweet spot for most shirts and for pants that have been folded over a hanger.
- Double-Hanging: This is my favorite space-saving trick. Install a top rod at 80 to 82 inches and a bottom rod around 40 inches. You've just doubled your hanging space!
Here's a pro tip I always share: Take your longest piece of clothing, put it on a hanger, and measure it. Add three or four inches for clearance from the floor (or the rod below it), and you'll have the perfect custom height for your clothes.
Will a Tension Rod Damage My Walls?
When installed correctly, a tension rod is perfectly safe for your walls. They're designed with soft rubber or silicone ends that use pressure to grip the surface without leaving marks or dents.
The only time you might run into trouble is if you crank it too tight. Overtightening puts way too much stress on your drywall. The trick is to extend the rod so it’s just a tiny bit longer than the space, then compress it to pop it into place. It should feel secure and snug, not like you had to wrestle it in. Making sure the wall is clean and dry first also helps the end caps get the best possible grip.
Ready to finally conquer that closet clutter? A new rod is a great start, but pairing it with the right hangers is what really transforms the space. MORALVE's innovative, space-saving hangers are designed to help you maximize every single inch of your closet.
See how our smart organization solutions can make a difference at moralve.com.
Leave a comment